9.2. How to Upload GVX Vectors into OP
To upload GVX vectors to your project, start at the Manager’s Page and click on the “Upload GNSS Vector” button from the menu on the left-hand side of the screen, as shown in Fig. 9.1.
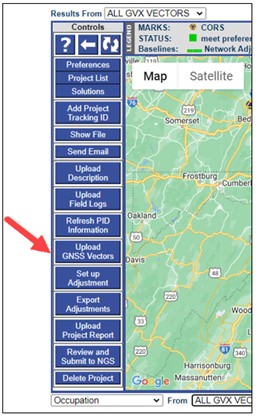
Fig. 9.1 Upload GVX Vectors button from the Managers Page
A pop-up window will appear, as shown in Fig. 9.2, prompting you to upload a GNSS Vector (.GVX) file. To browse for GVX files on your computer, click on the blue button labeled “Browse (.gvx)”.
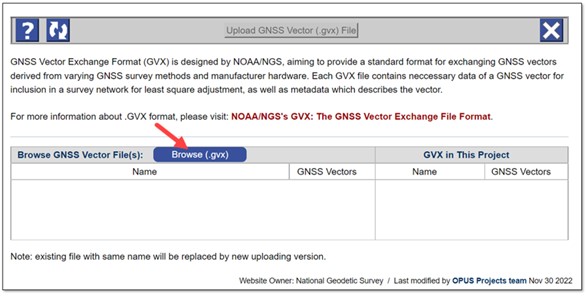
Fig. 9.2 Upload Upload GVX Vectors pop-up window that allows you to browse for .gvx files on your computer
Next, you should navigate to the directory containing the files you wish to upload to your project. You may batch upload multiple files by highlighting multiple files at once, as shown in Fig. 9.3. Once all files have been selected, click on the “Open” button.

Fig. 9.3 Upload Upload GVX Vectors pop-up window that allows you to browse for .gvx files on your computer
The Upload GVX Vector pop-up window will tabulate the number of GNSS vectors in the selected file(s). Fig. 9.4 shows 3 GVX files with 13, 15, and 18 vectors included, respectively. (If the GVX file is not formatted properly, the table will say “invalid .gvx will be excluded”. The thrown error will also be listed at the bottom of the window).
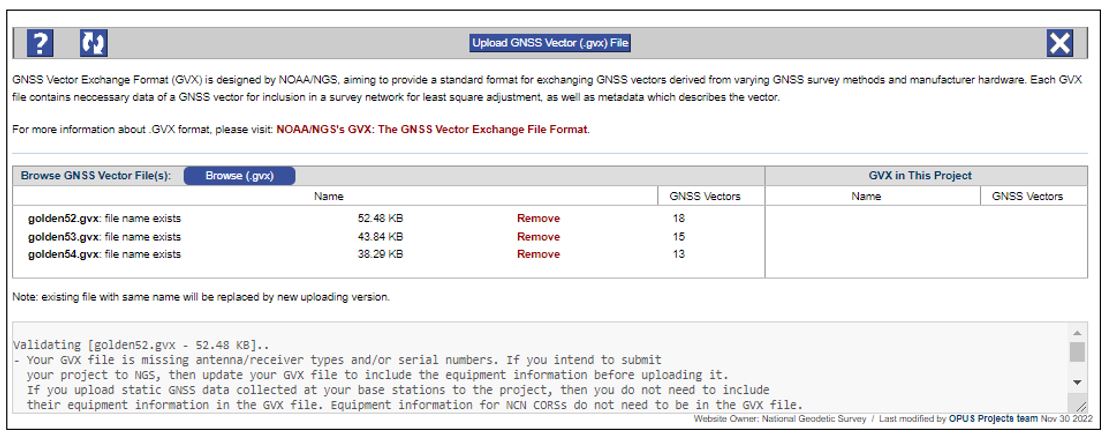
Fig. 9.4 An example of the Upload GVX vector window showing the three selected files and the number of vectors contained in each file. The lower part of the window contains any GVX error messages.
Next, click the blue button labeled “Upload GNSS Vector (.gvx) File”, as shown in Fig. 9.5.
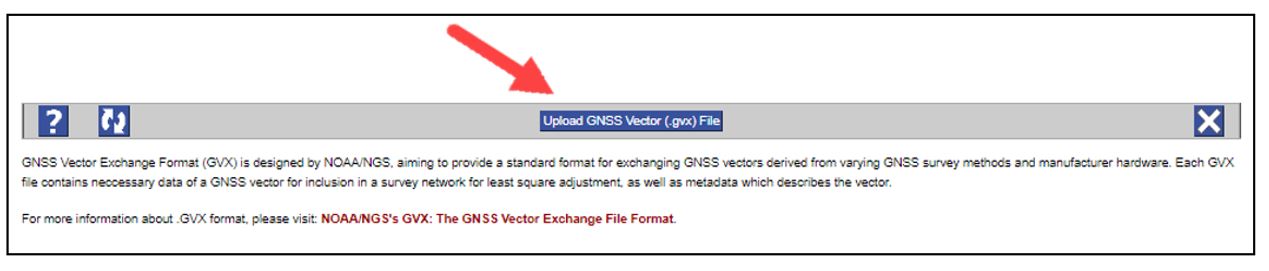
Fig. 9.5 Clicking on the “Upload GNSS Vector (.gvx) File” button is the last step you need to perform to add GVX file(s) to your project.
Depending on the size of your GVX file(s), this process may take a moment. Once the request is completed, the Managers Page map will update and display diamonds for all GVX-only surveyed marks and dashed purple or cyan lines for all uploaded GNSS vectors, as shown in Fig. 9.6. In this example, one CORS in the NOAA CORS Network station “umbc”, was automatically added to the project. This was added because some of the GNSS vectors originated from it. NGS recommends (and for project submissions even requires) uploading static data files (RINEX) for all other RTN/RTK base stations as outlined in Section 6.
Tip
NGS recommends (and for project submissions even requires) uploading static data files (RINEX) for all other RTN/RTK base stations as outlined in Section 6.

Fig. 9.6 Updated Managers Page map displaying the newly uploaded GVX/GNSS vectors and highlighting the additional CORS added to the project (station “umbc”).