6.4. Checking Your OPUS Solution Results
Note that an observation file may be successfully processed in OPUS and loaded into the project despite not meeting the data Quality Thresholds defined in the Project Preferences (Section 4.3, above). If any of the Quality Thresholds are not met, OP will send a warning email message to the project member who is uploading the file. The warning message simply helps highlight potential issues. The icons used in OP to identify and display the user marks and their corresponding OPUS solutions will indicate whether the solutions met the Quality Thresholds (see Section 7). Prompt review of OPUS solutions will help ensure maximum efficiency in the field, so return trips to project sites won’t have to be made if any solution was sub-optimal.
Caution
Anyone uploading GNSS observation files to the project should carefully review each project mark’s OPUS solution as soon as possible to verify the quality of the observation
OPUS Solution results can be found in an email sent to the project manager, as well as to the email address used to upload the GNSS observation file. They can also be found within the project, by clicking on the “Show File” button on the Manager’s Page, as shown in Fig. 6.6.
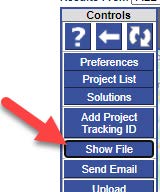
Fig. 6.6 Show File button to access all solution reports
Select the appropriate user mark (illustrated in Fig. 6.7) and session to view the available OPUS Solution.
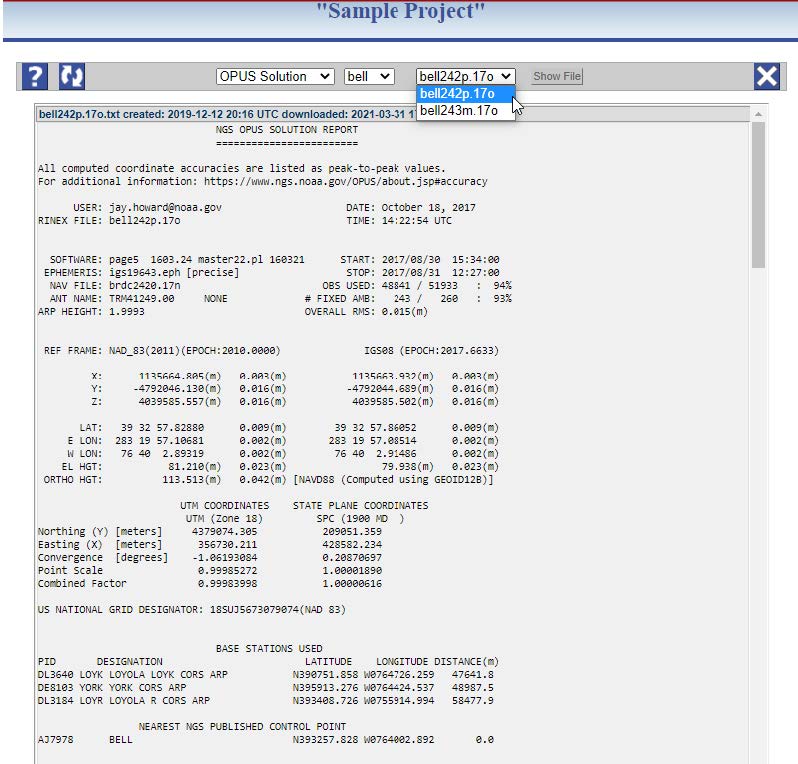
Fig. 6.7 OPUS Solution results
Things to check in an OPUS solution:
The start and stop times are correct and in accordance with the survey plan.
Solution results consistent with the project preferences
If this observation is on a user mark already present in the NGS database, compare the OPUS result to the corresponding datasheet’s coordinates. Do they match within the combined uncertainties of GNSS and the published coordinates? If they match, that validates the observation. If they don’t match, is there anything else about the observation that may point to a blunder? Was an antenna extension used? Was the correct mark observed? Note that a discrepancy does not necessarily mean a bad observation, but a good check is always a good validation of one’s procedures.
Typically, the coordinates for the first OPUS solution for a user mark will be used as the a priori coordinates for the processing. In the rare occurrence that the project manager wishes to change the a priori coordinate for a user mark, it should be done now before any sessions are processed that contain the mark. This may be accomplished by navigating to the mark’s web page and editing the a priori coordinate values (Section 7.3.12).
Quick checks can also be made by clicking the user mark icons on the Manager’s Page map. This will cause an information “bubble” to appear displaying the list of data files associated with the user mark and related information such as antenna type and ARP height entered with the upload (see section 7 and Fig. 6.8).
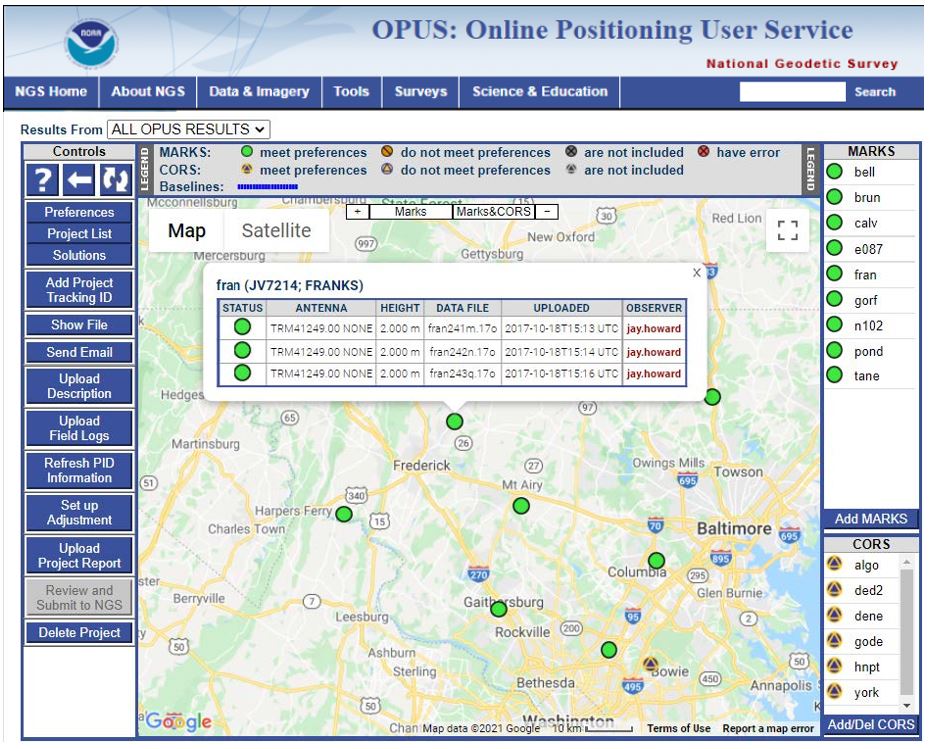
Fig. 6.8 Manager’s Page, showing information on data files associated with a user mark
A more thorough check can be made from the user mark web pages. To access these pages from the Manager’s Page, make sure the “Occupation” from “ALL OPUS Results” table is shown (see red arrow in Fig. 6.9).
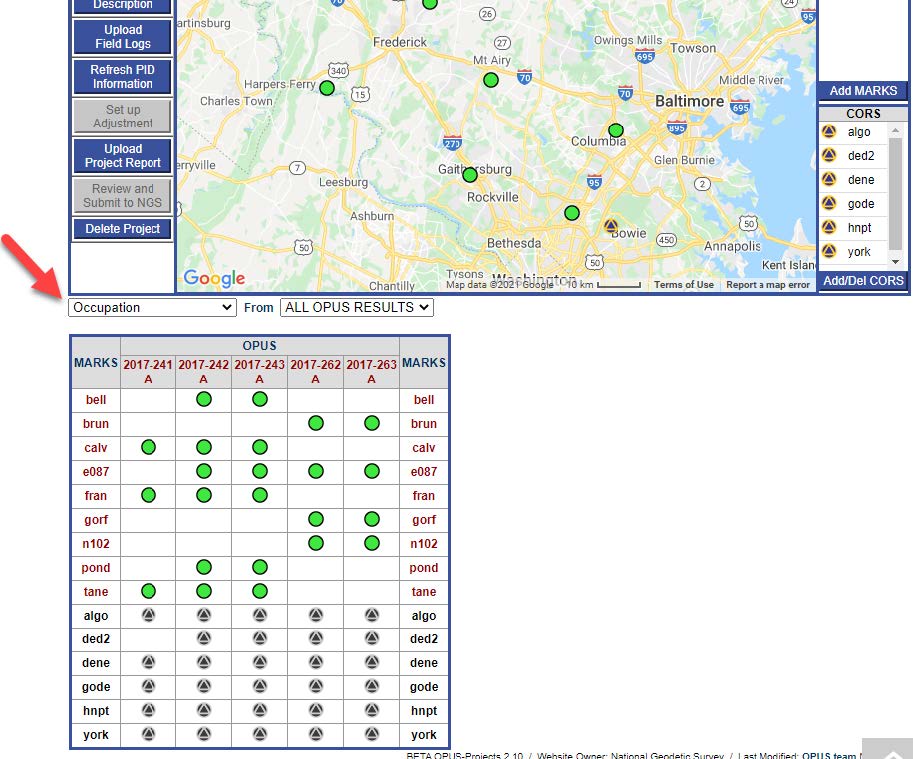
Fig. 6.9 Manager’s Page showing “Occupation” information from the “ALL OPUS Results” Report Table
Click on one of the MARKS to open web page for that mark, as shown in Fig. 6.10.
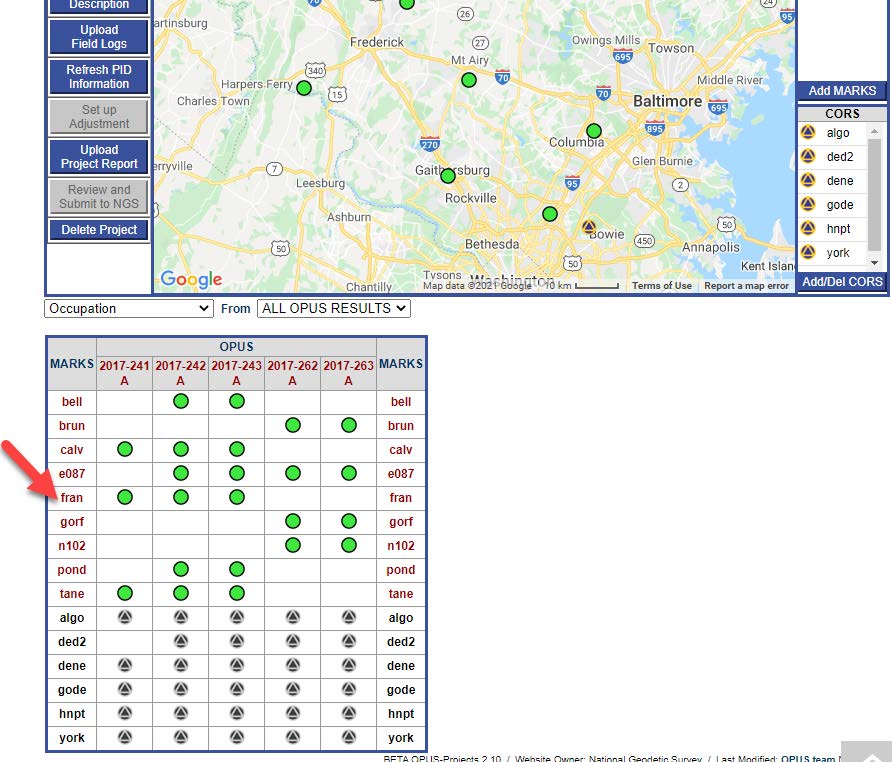
Fig. 6.10 Click on a user marks for access to the corresponding Mark page
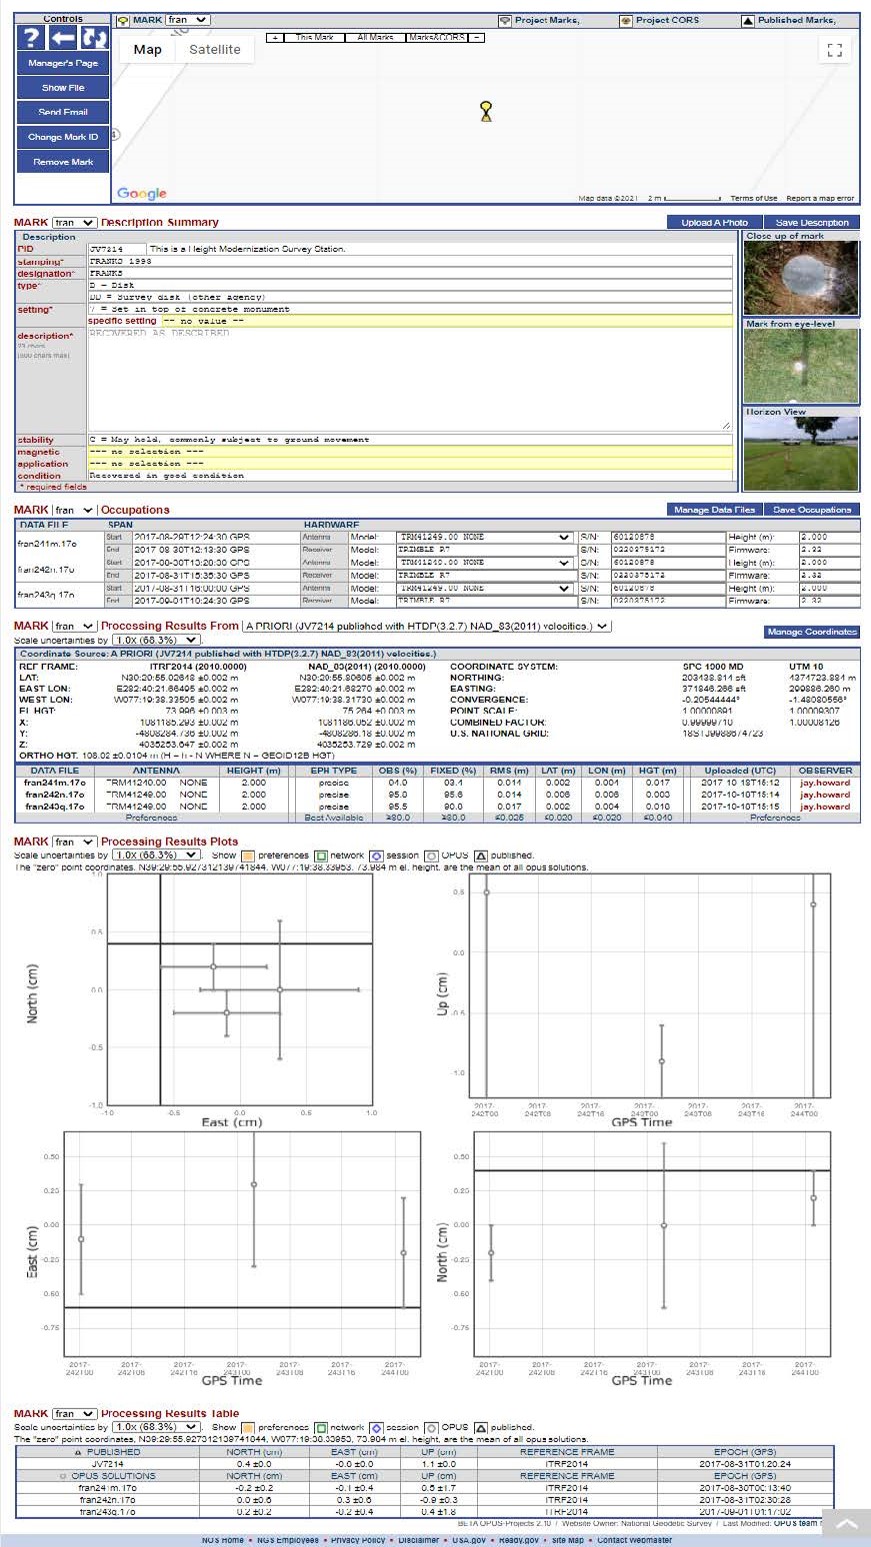
Fig. 6.11 User Mark web page
On the individual mark pages, shown in Figure Fig. 6.11, the data files are also listed along with related information, and some information can be changed (e.g. a MarkID, antenna type, antenna height). Additionally, data files can be reassigned to another user mark if OP made the original assignment incorrectly. See Section 7.3 for more information.
Caution
Ultimately, OP arranges observation files according to coordinates, not names. If a file was incorrectly names, you can correct the mark name from the project mark’s web page
Caution
Note that some changes on a mark page may be superseded once the corresponding mark’s description file has been loaded into the project. Check to make sure the designation in the marks page agrees with the designation in the description file.
Rarely, other information associated with a user mark, such as the state plane coordinate zone, may need to be changed. This can be done through the “Manage Coordinates” control on the user mark page (Section 7.3).
This is also a good time for the project manager to verify that the appropriate user mark IDs are correctly assigned. If the GNSS data files followed the recommended file naming convention (see Section 5.1), the user’s mark IDs should be correctly assigned (recall that the four-character user mark ID are normally taken from the first four characters of the vendor proprietary file type or RINEX file uploaded through OPUS to your project). If inconsistencies are found, mark ID’s such as a001, a002, etc. will appear. These are “placeholder” names automatically generated by OP. It is recommended to change these names to keep project nomenclature as consistent as possible with GNSS observation logs, datasheets and other files associated with the project. A mark’s ID can be changed on its individual mark page See Section 7.3.4.
Tip
Once you have opened a MARK page, you can easily navigate among other user marks by using the pull-down menu at the top of each data display field.
Finally, although session processing can begin before all data for the session are uploaded, this is not recommended. Processing before all data are available may be prudent if errors or inconsistencies are found and cannot be otherwise rectified, but should be avoided otherwise.
Please always bear in mind that if a session is processed before all of its data are uploaded, it is almost certain that the session will need to be reprocessed after all data has been uploaded. The user has the option to delete individual sessions or overwrite the session by reprocessing using the same session name or reprocessing the session but changing the session name thus keeping both sessions. To avoid confusion, it is recommended to append either a character/digit to the root of the session name, or a short ID like “test” or “final.” For example, if the default session name is 2020-123-A, then the digits 1, 2,3, etc. can be added to differentiate the different re-processings. Final names would be 2020-123-A1, 2020-123-A2, 2020-123-A3, etc.)
Danger
Only the first character of a solution name is retained in the output files needed for publication in the NGS database. Therefore, names like “A-test” and “B-test” will be differentiated as “A” and “B”, but names like “Test-A” and “Test-B” will be treated as the same solution “T”.